When you create an email, there are a lot of things to consider than just the text of your message - the visual style
is something that most readers will notice first. And if you have your own business or brand, it becomes even more
crucial that your message looks professional and keeps a consistent look which is something email templates can be
used for.

Email templates for business
We already talked about how Signatures are useful in
communication your brand and what they
should include to appear professional. While signature can communicate more about your profession and skills and
provide additional contact information, it only gives those details at the very end of your message, and sometimes
you might want to communicate your brand or company from the very start.
A header image before the salutation or simply using your brand colors for fonts and backgrounds can keep things
simple but also put your emails onto another level, making them instantly distinct from the basic black on white in
default system fonts.
How to create email templates - a step-by-step guide
This guide shows how to set up your email templates with eM Client.
-
First, go to Menu and click on the "Settings…" option.
-
In Settings, go to "Mail" > "Templates and Signatures"
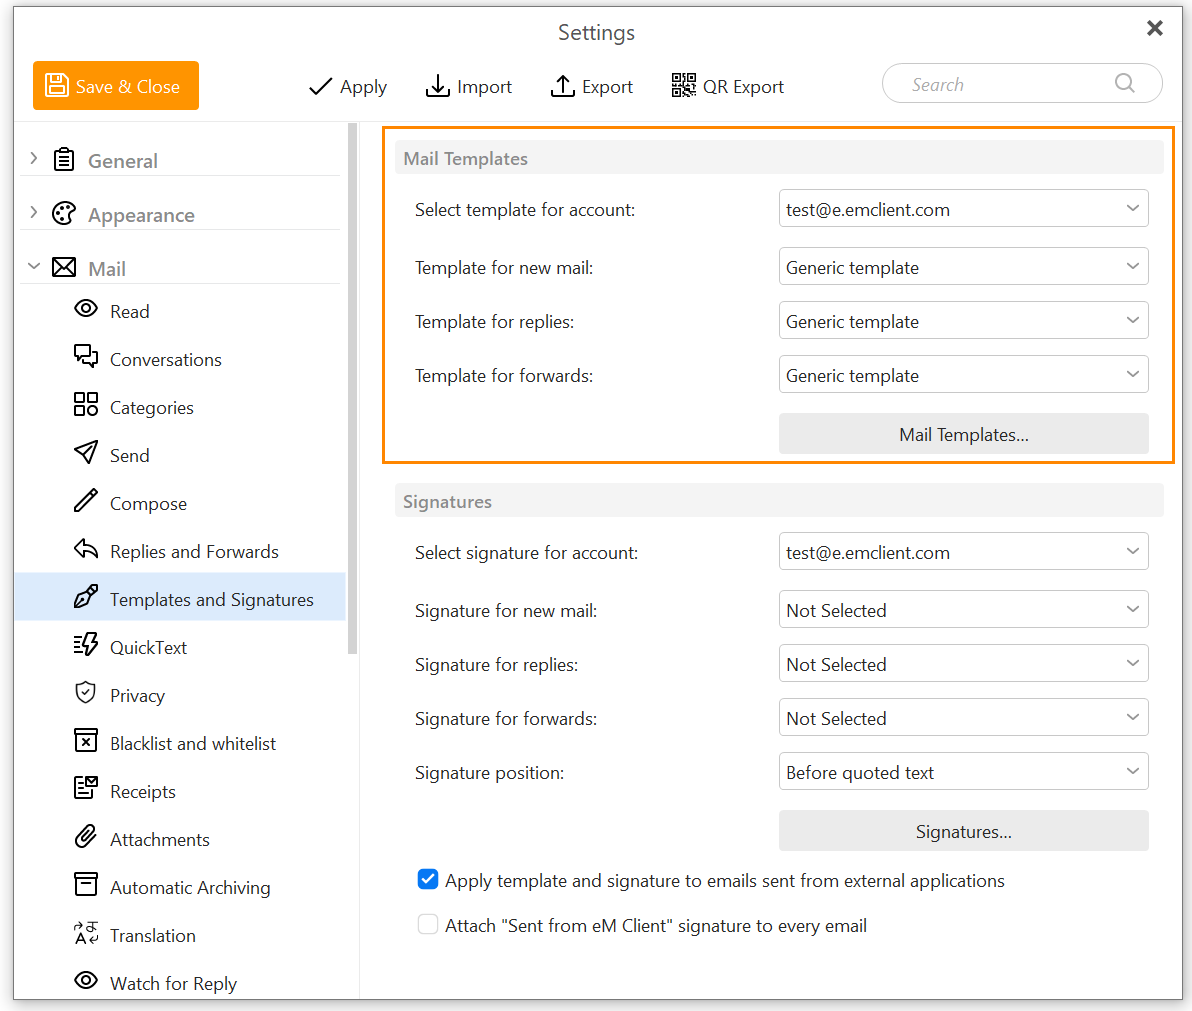 Set your templates and signatures here - for new emails, replies, and
forwards
Set your templates and signatures here - for new emails, replies, and
forwards
-
To create a new template from scratch, click on "Mail Templates…"
-
In the "Mail Templates…" section either click on "New" and create a
completely new template - or just import your previous templates by clicking on "Import".
Format and edit template as you wish - attach the files you always send in specific cases, change the background,
and so on.
You can change the template colors to reflect your company’s brand design - for example by changing the font color
to blue:
To edit an already existing template in the eM Client desktop app, head to Settings > Mail > Templates and
Signatures > Mail Templates.
Once in the Mail Templates section, choose the template you wish to edit and click on the "Edit"
button.
For even better templates, consider using the "edit source code" feature.
How to edit source code in the eM Client desktop app
In the Templates text editor, the "Edit source" option is available once you right-click in the
text box.
This feature allows you to customize your templates to look exactly the way you want them to, by editing the HTML
source code of the template.
In case you have some templates you would like to import, click on "Import" and choose your import
file in emlt, oft, htm, or html format from your desktop.
And there you have it! Anyone can create email templates easily with eM Client - make sure to try it out.
Template examples
In order to show you exactly how it works, feel free to download these template samples created by our team. Simply
download the one you like best and go to Menu > Settings > Mail > Templates and Signatures in eM Client,
click the Templates button and import your selected EMLT file!
New to eM Client?
Try it out! It's free and fabulous.
If you’re ready for more, buy the Personal or Business
license and enjoy:
And in the meantime, check out our YouTube channel for how-to videos.